Update:
I’ve created a quick video to help people who get stuck with the tutorial:
Hidden object games are hugely popular at the moment, if you haven’t played them the idea is simple, you get a series of pictures and you have clues to what objects you need to find, then you tap your screen/click your mouse over the items as you find them. I promised a friend I would create a very simple hidden object game and put it on the play store for them. I honestly believe that making games for Android has reached the level that anybody can do it even without programming knowledge and wondered if I could make the game with Unity and exisiting assets. Although saying that I do think it is a great way to learn programming because as you develop your game you might want to add more functionality and have to write yourself a little C# script.
These are the notes I made when making the game, I’ve spruced them up a little so most people can follow them. If you have any experiance with Unity at all you should be fine. If you do not have the experiance then you should still be able to follow, but it might take you a while to work your way around Unity, discovering what all the panels do and the such. With some experiance I’d say the game takes about an hour to make, but it is very simple and you will want to add your own cool stuff to it. The premise is simple, find their badly Photoshopped cat in an image and then press her to win and move on to the next image. There is still lots more to do, I still want to add a pinch to zoom function and better images. I’d take this tuturial as a ‘proof of concept’
Here are my notes:
Collect your resources
First, you need some stuff to make your game. Basically you need some images and a PNG with transparent background to find. Since this was a proof of concept I didn’t spend a long time collecting them, but to make something serious you will want really good backgrounds and images to find, it might be a good type of game to build if you are a designer type person.
I just have a few PNG’s of the cat with a transparent background and some Creative Commons images that I have taken from the Creative Commons image search. Media Commons has a great little feature where it gives you some help text you need to attribute to the image, so while I was grabbing the images I also jotted the attribution requirements down for each image.
Set up Unity With Fungus
I’ll be using Unity to make the game, which is a game engine/development tool that many indie/hobbyist game developers use. It can be quite powerful and scary, but we’ll be using an ‘asset’ to make thinges easier. Head over to Unity3D and grab the latest version for your OS. Once you are up and running start a new project, name it whatever you want but make sure that the big 2D button is pressed.

We are making a 2D game, so the 2D button has to be red.
When you’ve created the game a scary looking screen will appear. Don’t worry, there are LOTS of things you can do with Unity so there are lots of options, but we are only going to use a small amount of the tools availble.
I want to use Fungus to create the game, it is an asset that helps you make visual novel games, part of it’s functionality is that it lets you click on stuff to move the visual novel forward. I’m going to use this bit of functionality to make my hidden object game. While leaving the scary looking open, open a browser and head to the Fungus Asset website. What we are going to do here is download an asset to make the game development easier. If you click the big green download button on that webpage and open the downloaded file then Unity should wake up and you will be prompted with this:
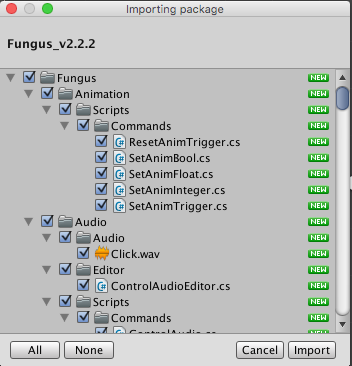
When you open a .asset with Unity it asks you what you want to import to your project from the asset. To import Fungus you have to make sure they are all selected.
This dialog box is asking what files to import from the asset you’ve just download. Make sure the are all ticked and then press import. Unity will then think for a little bit while it imports the package. Once it has done we want want to open an extra window panel in Unity. This window panel, the ‘FlowChart’ isn’t a part of Unity reguarly but is functionality we have just added through the Fungus plugin. To open the panel you need to go to Tools->Fungus->FlowChart Window in Unity, like so:

Open the Fungus flowchart window
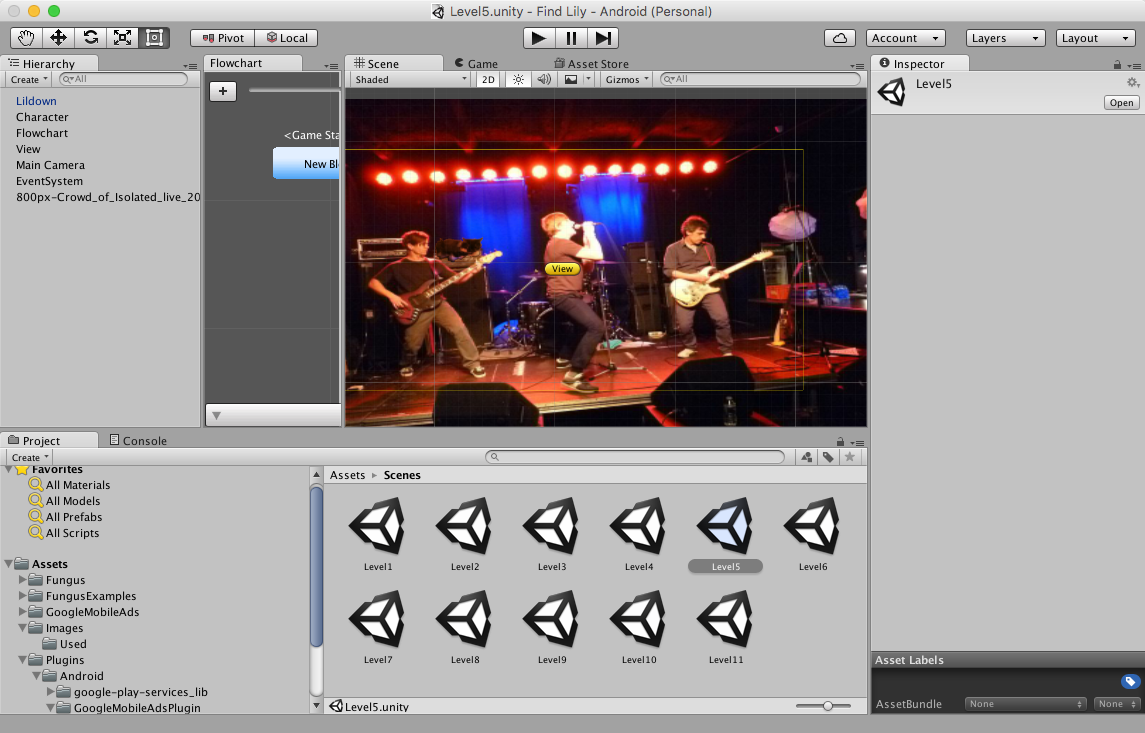
Congrats! You’ve set up Unity ready to make your game. It should look something like this
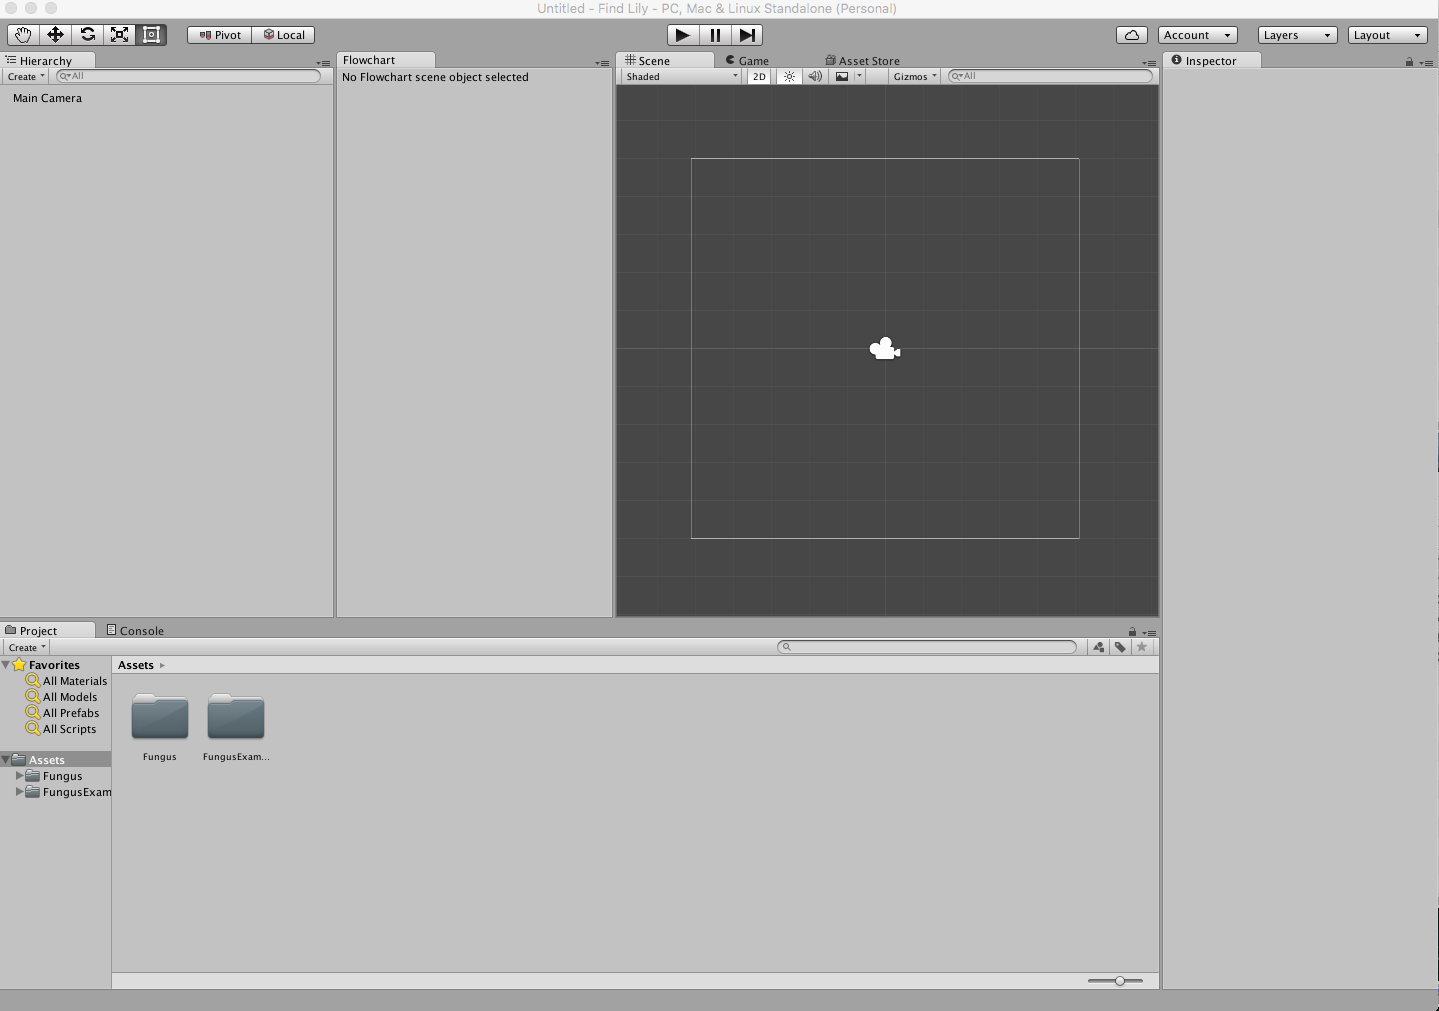
This is my Unity setup, click to enlarge and compare. Although, yours doesn’t have to look the same.
Don’t panic if the Windows are in different places, you can move them to any place you like. It is scary at first but you soon get used to what every bit does. The best way to get used to Unity is just to play with it a little bit. I quite like how all the additional functionality added by Fungus is in it’s own menu which helps you distingish between core Unity functionality and what we have just added with the Fungus asset.
Add your images to the project
We need to add the images we have collected to the project. To do this we work with the ‘project pane’ the one at the bottom of my Unity screen shot. At the moment it just has Fungus and FungusExample in there, those are from the assets we imported. I need to add the pictures that I have downloaded. To keep things organised I did this by a right click in the pane and press new->folder, call the folder images. You can now drag all your photos and pngs in to this folder like so:
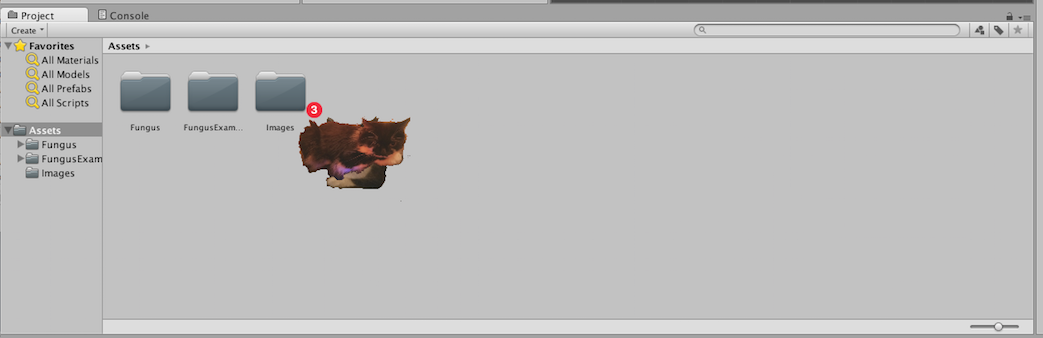
Dragging 3 Cat PNGs in to the Images folder
Create a Fungus View and Flowchart
Fungus is an asset that lets you create Visual Novel games using a flowchart. One of the things it does is let players click items in the Visual Novel. I’m going to completly skip making a visual novel and just use it’s click detection. First we need a view in our game scene, to do this go to Tools->-Fungus->Create->View. A view is a Unity object that helps us control what will appear on the tablet/phone/computer screne.

Creating a view
You’ll notice that ‘view’ appears in your hierarchy panel. The hierarchy lists everything that is in the current scene you are working on. That’s right, your working on a scene! A scene is a bit like a level, and now that we are working on one I suppose that we should save it. I like to create a new folder in the Project panel (like we did for images) and call it scenes. Then I go to Unity->save Scene and save it in the new folder.
If you click the new View in the Hirarchy window you will notice a green thing appear in the scene. This shows the thing that will appear in your game. The longer rectangle shows 16:9 ratio and the smaller one 4:3, so that you can plan your game for different sized tablets. If you want an image to appear in your game you can drag it from your images folder on to your view, it will look like so.
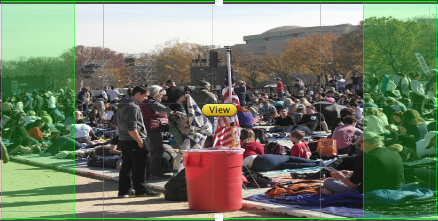
Put your picture in the view
However, if you press play on your game you will see something like this:

No Good, we want to start messing with the camera and the such now, but since we are going to do everything in this game using Fungus we need to add a ‘Fungus Flowchart’ in to our project. To add a flowchart you need to go to Tools->Fungus->Create->Flowchart, this will add a flowchart to the hierarchy, and we can edit it in the flowchart window we opened before. Click on the New Block in the Flowchart panel and information about it will appear in the inspector. So far it just starts with a block that makes a visual novel character saying hi You can right click the say command and click delete.

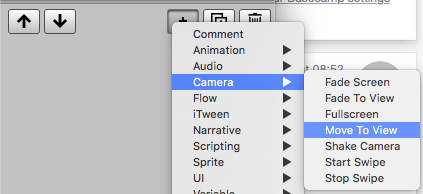
We want the flowchart to use the view we set up, the one with the image in. We are going to add a new command to the block to replace the one we’ve just deleted. Click the little plus icon in the inspector and add a camer->move to view command. This bit is important: In the resulting box that says ‘Move to View’, there is an empty variable called Target View, you need to drag the View from your hierarchy in to this box. I also changed the duration to 0 so that the image appeared stright away.
Next I want to add the cat to the game. The cat is what is called a ‘clickable sprite’, to add one we go to Tools->Fungus->create->clickable sprite. You’ll see a huge mushroom appear on your game scene, to change it to the PNG you want to find you need to drag your image from the images folder in to the Sprite variable in the inspector (when the Clickable sprite is selected).
This is what your Unity workspace might look like now. You might want to play around with moving the cat where you want. If you click your clickable sprite in the heirachy you can do all kinds of cool things, I made mine so that the clickable area only included the cat and not the transparent bit of the PNG:
Don’t panic that yours doesn’t have lots of levels, I’ve created a few by this time
Your hidden object scene is now almost done. You just need it to do something when the cat is clicked. In your flowchart window press the plus sign to create a new block. In the inspector panel for the new block look for the execute on event option and change it to Object Clicked and drag your ClickableSprite over to the Clickable Object Variable. Any actions you put in here will be ran when the object is found. I added two actions, first I added a narative->say action that said the cat had been caught and then I loaded a new scene called ‘Level2’. You can create as many scenes this way as you like and link them together the same way,
Once I’d done 10 Levels I created a menu. I did this with a simple flowchart, a good practice technique would be to try and do this yourself!
You can download find lil if you want a look.
Got stuck, can’t make the menu? Video coming soon.

2 Comments
Bushra · January 27, 2016 at 7:53 pm
Hi, can you send me the full tutorial. I dont understand how you added the last two action “I added two actions, first I added a narative->say action that said the cat had been caught and then I loaded a new scene called ‘Level2′. You can create as many scenes this way as you like and link them together the same way,”. Thank you very much for the helpful tutorial as Im trying to make a hidden object game.
David Sherlock · March 3, 2016 at 5:36 pm
I recorded the process in case it is helpful:
https://www.youtube.com/watch?v=UuN6vpLSW5E